USB Debugging is a method of communication between computers and Android devices. It enables your device to access advanced tools and operations by executing the Android Software Development Kit (ASDK) through your PC. An ASDK contains almost every resource that you need for developing applications. Here we are discussing about USB Debugging on Android Devices.
Some of the time, Android Studio is installed together with the development kit. It is also a development software for specific apps and programs. Enabling your Android Device’s USB Debugging lets you access these tools’ advanced features like a pro.
How to Enable USB Debugging on Android Versions 2.3 and Later?
USB Debugging is commonly hidden from the menu on most Android phones. You will have to learn the proper steps on how to access the Developer Options menu. Listed below is a thorough guide on how to enable USB Debugging on different Android versions.
On Android 2.3 and Earlier
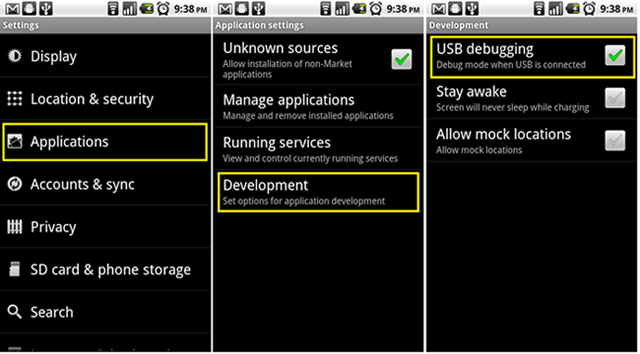
Android 2.3 and earlier versions of the operating system have the most comfortable way of enabling the USB Debugging feature.
- Step 1. On your Android device, navigate to the Settings app. Look for the ‘Applications’ menu and tap on it.
- Step 2. Click the ‘Development’ button. Once you are there, tick the ‘USB Debugging’ checkbox. Then, that’s it. In a matter of two steps only, you are successfully on Developer Mode.
On Android 4.0 to 4.4
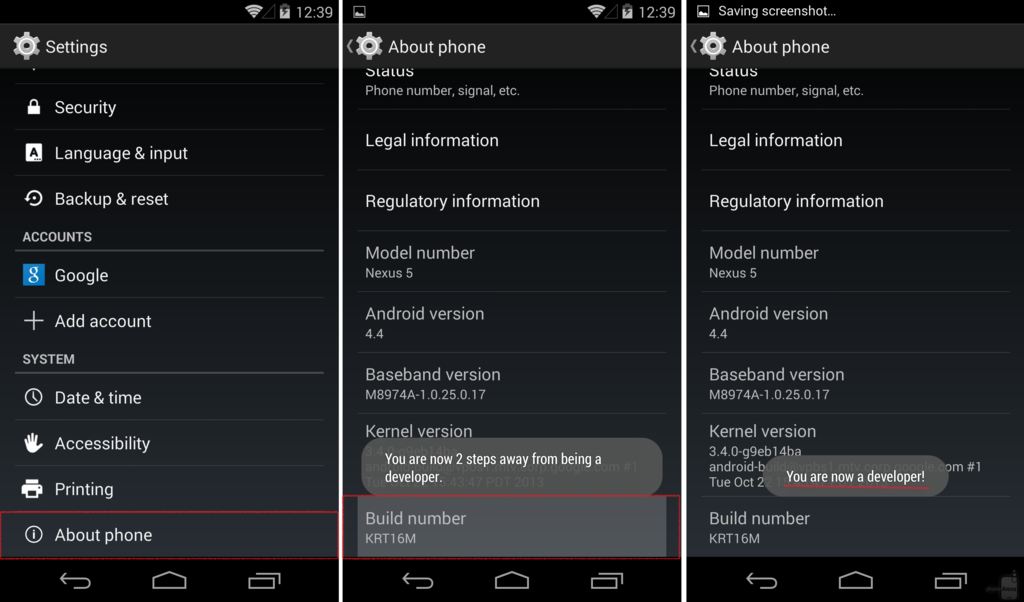
- Step 1. If your phone runs Android version 4.0 to 4.4, follow these steps briefly. First, navigate to your device’s Settings. Scroll down to the bottom and click ‘About Phone.’
- Step 2. Once you are there, look for your phone’s ‘Build Number’ and tap it seven times. A prompt message will pop-up, saying, ‘You are now two steps away from being a developer.’
- Step 3. Then, go back to the ‘About Phone’ menu and click the ‘Developer Options’ on the bottom-most section.
- Step 4. The last step is to mark the specific checkbox on the ‘USB Debugging’ field to enable it. A prompt message will then pop-up, indicating that ‘You are now a developer!’
On Android 4.5 and Later
- Step 1. First things first, go to the Settings app on your Android device. Then, look for the ‘About Phone’ section, it is commonly found on the bottom-most part.
- Step 2. Once you are there, find your device’s ‘Build Number.’ You will have to click on it seven times and wait for the prompt message saying that you are already on Developer Mode.
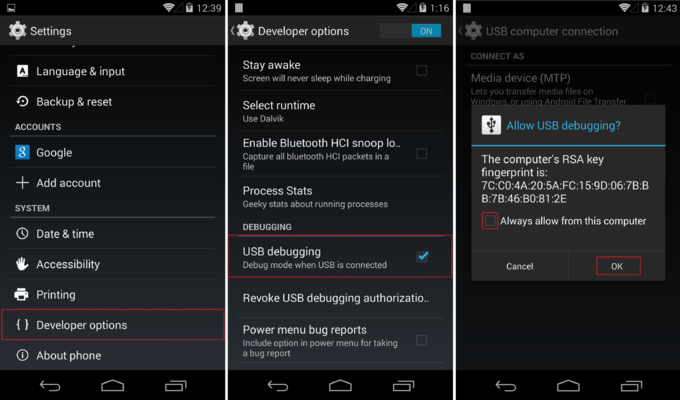
- Step 3. After that, you need to go back to the Settings app and find the ‘Developer Options’ Menu. Tap on it to show the prompt message.
- Step 4. Lastly, click ‘OK’ to allow development settings. There you have it. You have enabled the USB Debugging feature on your phone.
Can I Enable USB Debugging on a Locked Android Smartphone?
Enabling the USB Debugging feature on Android devices without issues is as easy as counting one, two, and three. However, it could be troublesome for someone with a locked phone. Fortunately, there are still different methods to be on Developer Mode.
Whatever the reason is, whether you have forgotten your Password, Pattern, or Pin, the list below will help you enable USB Debugging on a locked Android device.
3 Ways to Bypass Android Screen Lock to Enable USB Debugging
To enable the USB Debugging feature on your locked Android phone, you will have to follow any of the methods below that works for you.
Using Dr.Fone
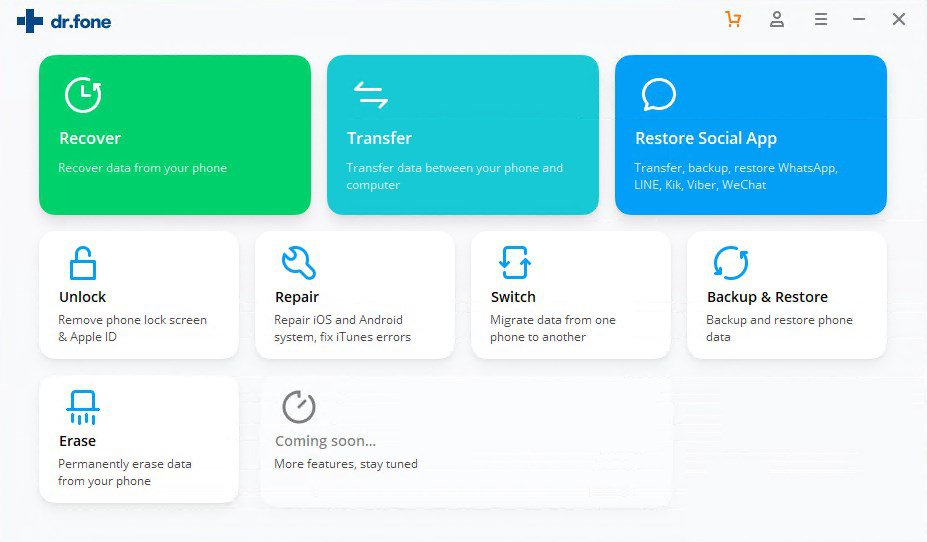
- Step 1. You will have to download and install the ‘Dr.Fone – Screen Unlock’ software to your laptop. Connect the smartphone to your laptop and run the app. There are many options available on the screen, but you have to click the ‘Unlock’ button. Then, tap ‘Start’ to start the lock screen removal process.
- Step 2. You need to choose the correct model of your Android device by indicating the right brand and name. Tap on the ‘Next’ button and then click ‘Confirm.’ To enter Download Mode, follow the on-screen instructions, which is very straightforward.
- Step 3. After that, shut down your phone by pressing the home, power, and volume down buttons simultaneously. Then, press the volume up button. Your device will be in Download Mode, then wait for the Recovery Package to complete downloading.
- Step 4. After that, your Android device is now bypassed. You can now easily navigate the top part of this list and follow how to enable USB Debugging.
Using “Find My Mobile”
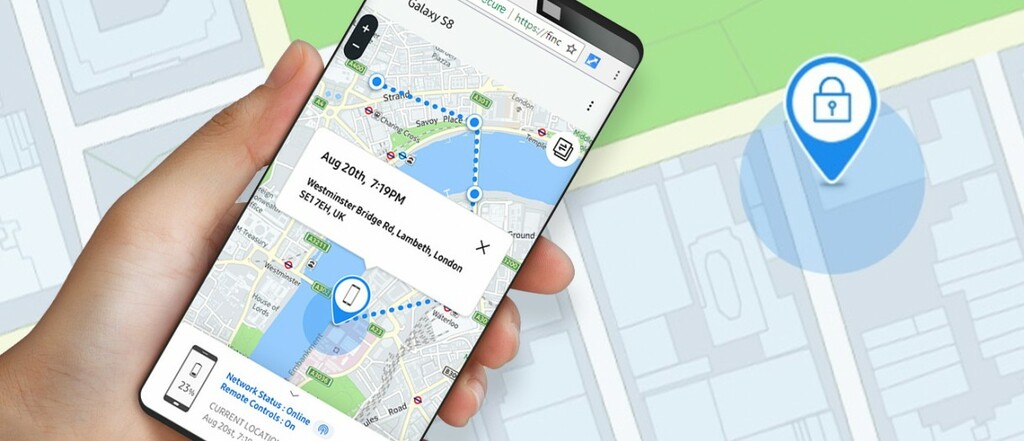
- Step 1. If your smartphone is Samsung, you can use its Find My Mobile service. On your computer’s browser, log in to your Samsung Account and select the ‘Lock My Screen’ button.
- Step 2. Enter a new PIN and hit the Lock button at the bottom part of the screen.
- Step 3. After a few minutes, you can use the new pin you have created to unlock your Android device without resetting it or using Dr.Fone. Then, enable USB Debugging by following the procedures mentioned above in this guide.
Reset the Locked Android Phone
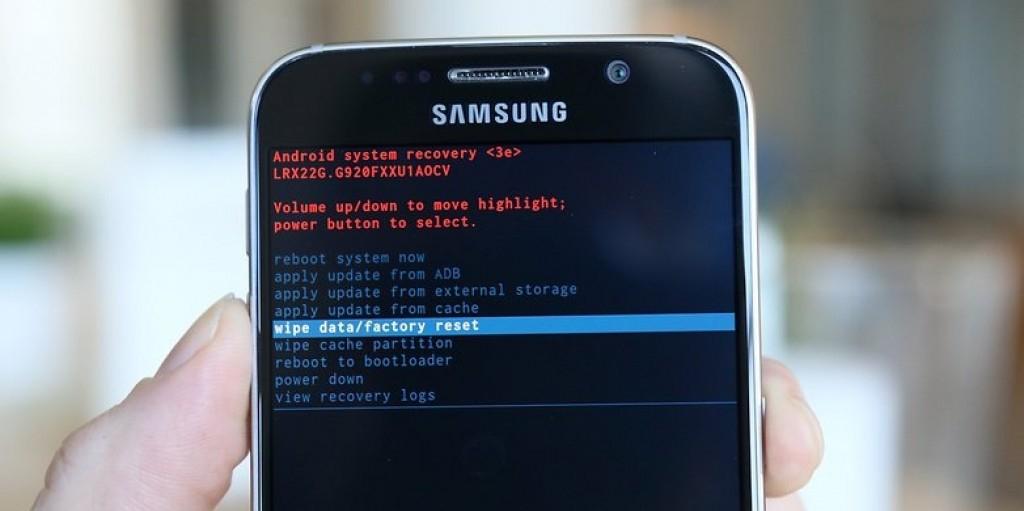
- Step 1. Resetting your locked phone to its factory mode is the last option to enable USB debugging if the above methods do not work. You need to turn off your device.
- Step 2. Enter Recovery Mode by hitting the power, volumes up, and down buttons together. Some phones have different key combinations, so better check the internet first for the one that suits you.
- Step 3. Use the volumes up and down buttons to select between ‘Wipe Data’ or ‘Factory Reset’ options. After the process completes, choose ‘Reboot System Now.’
- Step 4. Once your Android device is screen lock-free, you can easily enable USB Debugging by following the steps above, depending on your Android OS version.

In A Nutshell
This article will help you enable USB Debugging on different versions of Android phone OS, even if your smartphone is locked. Although beginners might think it is a little bit complex. But, if you follow this guide briefly, you’ll achieve your goal entirely.
Continue reading:

